***Come link up your crafts to this week's party!***
Showing posts with label kids room. Show all posts

Thursday, May 10, 2012

Night Table Makeover

Happy Thursday! This project was one that I did for a guest post over at Bella Nest a few weeks ago for her Drab2Fab series.

For my Drab2Fab project, I took a little piece of furniture that I already had that was well in need of a makeover. There are several things about this project that are awesome, first one being that this table was FREE. Several months ago my mom gave me this little night stand.

Photobucket


Cute, but clearly in need of an update. Now, this little table has been sitting in the guest room since I brought it home, and since we're changing our guest room to into a kid's room (see more on that here), now is the perfect time to makeover this little piece to match the new room theme.

Since the new color scheme of the room is going to be blue, green and yellow, I decided to paint the table top yellow and leave the bottom natural. Awesome thing number two is that the gallon of yellow paint I used was only $5.00 in the oops section in Menards - bonus! First, I sanded the table top with an electric sander and then I painted several coats of the yellow on the table top.


Now to add a decorative touch to the table. Since I've decided to go with an alphabet/word theme for the room, I used some alphabet stencils from Hobby Lobby that I got for $2.99 and some more paint that I got from the oops section for only $1.00 (yup, awesome x3).

Photobucket


I actually ended up using a much smaller brush than pictured to paint the stencils. After the letters dried I took the sander again and went over the whole table top to give it a nice distressed look, especially around the edges. 


Add some Minwax stain, wait 5 minutes, wipe off.


After the stain dried, I rubbed on some Minwax paste wax finish. I've never used this product before, and I'm not really sure I used it right, but I like the end result! After the wax dried, I polished the table with a clean, dry rag. It gave the table a smooth, slightly shiny finish.

Photobucket


Wahhh La! There it is. It turned out way better than I expected - I really like it! This is definitely the brightest color I've painted a piece of furniture, and I'm really glad I took the risk.

What do you think??

Thursday, May 3, 2012

Kids' Room Clock

Happy Thursday! So, I'm back from a week off from projects because I was sick last week. This week was sponsored by my lovely BFF. She got me this clock kit for my birthday a few weeks ago and it was such a fun thing to do!


The kit came with a wooden base, paints, brushes and the face mechanism.

I decided to use the clock in the kids' room, so I wanted to paint it to match the paper lanterns. For the circles, I used jar tops again and traced them with pencil.


To match the room, I used the green, blue and yellow paints from the kit - which were actually way higher quality than expected. I also decided that I want to add some Dr. Seuss quotes around the room as well, because who doesn't love Dr. Seuss?! So, after I painted the circles and [impatiently] waited for them to dry, I wrote one of the quotes I picked out on the clock with Sharpee.


So, this is what I ended up with. One problem: where do I put the numbers? Handy Andy pointed out the very important point that this is a kids room, so there has to be numbers. So, I was thinking of getting wooden numbers from Hobby Lobby and fastening them on the outside of the clock somehow. Still not sure. Any suggestions??

Hope you're having a lovely week!


P.S. Linking up here.

Wednesday, March 21, 2012

Painted Paper Lanterns

Hello All! I hope you're having a good week! Today I'm sharing a bit of personal news because it informs my project today and the projects that will inevitably follow. First off -- no, I'm not pregnant. However, Handy Andy and I are going through training to become a host home for Safe Families for Children, and will also be getting our foster care license this year most likely. Instead of explaining to you what Safe Families is, I'll just make you go to the site to read up on it! :)

In short, Handy Andy and I are both passionate about providing a safe, loving environment to children in crisis situations, and this is the direction we are heading with the goal of hosting children beginning later this year/early 2013.

In addition to training, we are getting our house ready by transforming our guest room into a gender-neutral, age-neutral kids room [why yes, that is challenging -- any suggestions??]. At this point I've picked a green, blue and yellow color scheme. I'm also thinking about an alphabet/words theme, but I'm still pondering that one.

Anyway, for the first little decor project, I decided to use something I already had...


White paper lanterns! [sorry, I didn't take a before picture, so this is off the internet]

I got these probably over a year ago on clearance at Hobby Lobby, and I think my mom bought them for me...so they were actually free! I love the look of these paper lanterns, but I couldn't find a spot for these in our house before now.

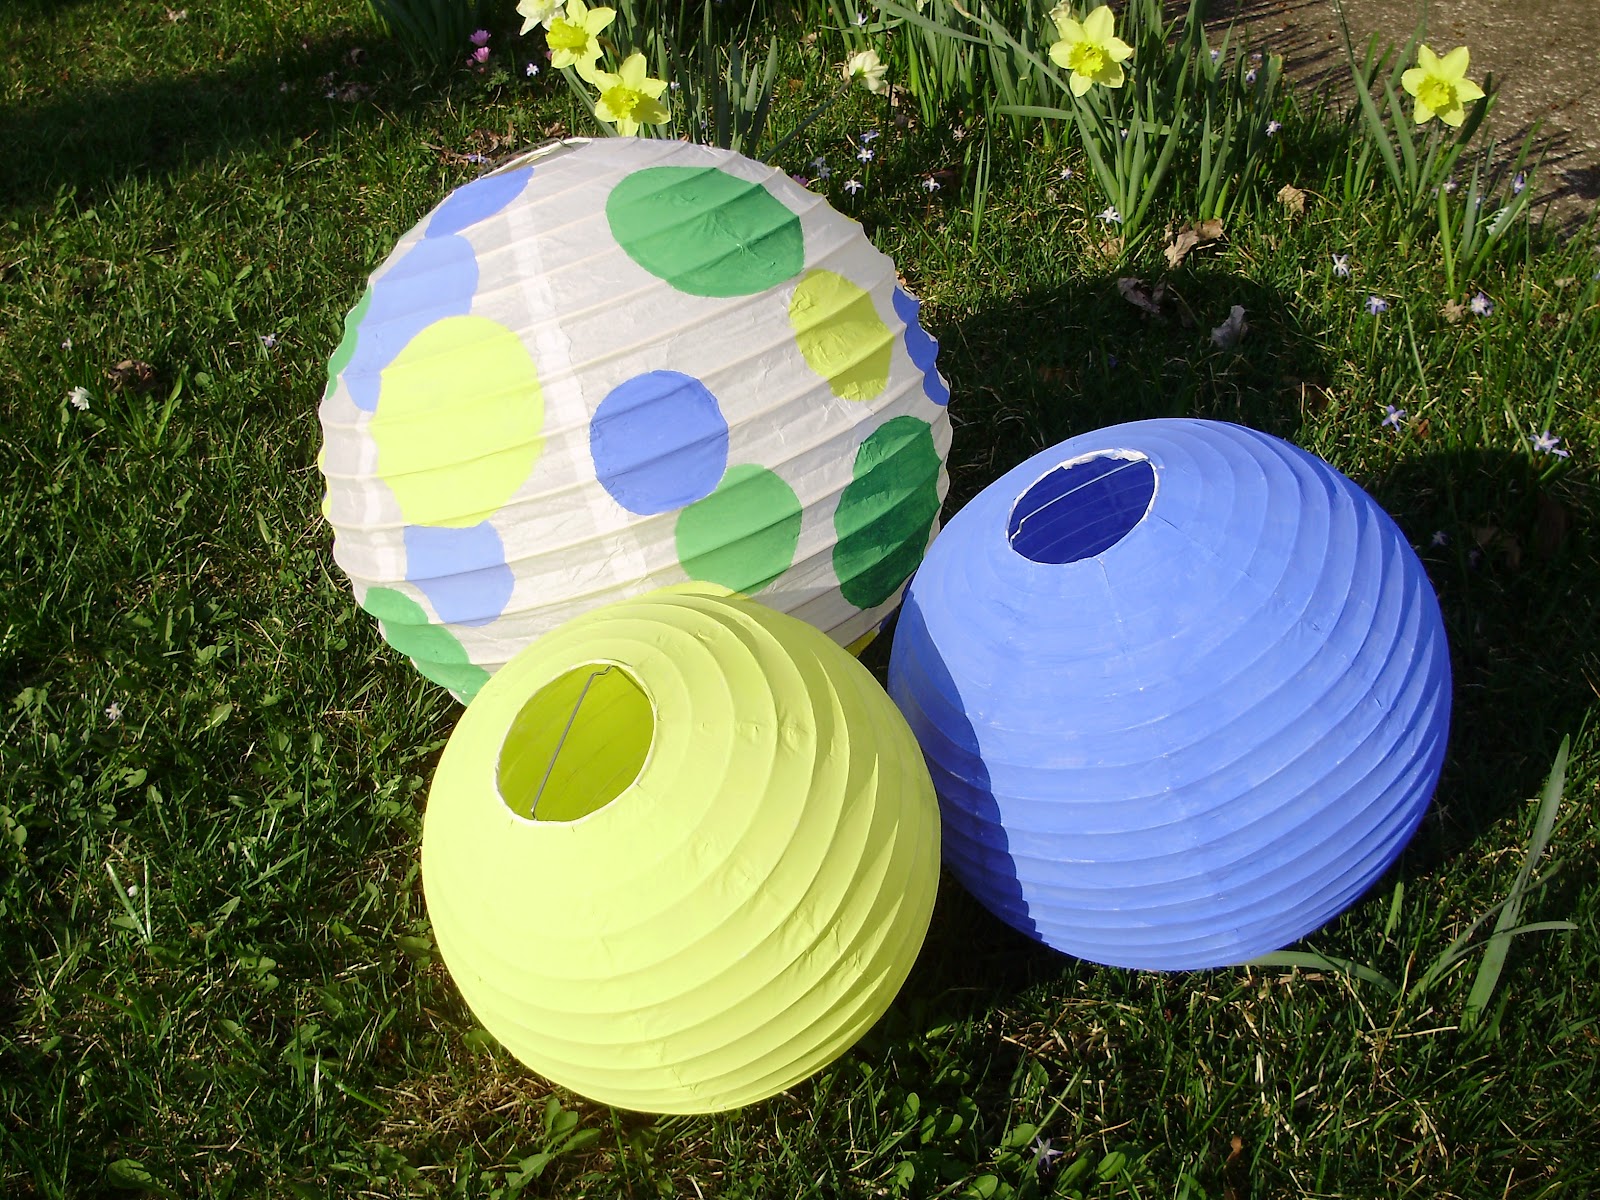
Once I decided on the color theme for the room, I got inspired to give these lanterns a makeover and [eventually] hang them in the kids room. I took some tempera paint I had, brushes, and a few jar lids to trace, and here's what I ended up with:


There was no special trick to this, but I did have to watch how much paint I brushed on at one time because the paper is really thin and was pretty fragile when it got wet. The circles were kind of annoying to trace and paint, so I only did the big one with circles. They turned out so cute! And this little project was FREE! I can't wait to hang them up!

Also, I recently purchased some clearance fabric to make some curtains out of...which should definitely be an adventure. Stay tuned!

Have a good one!


P.S. Linking up here!