***Come link up your crafts to this week's party!***
Showing posts with label furniture. Show all posts

Thursday, January 17, 2013

Refinished Table

Hello All! I hope your week is going well. We've been really busy lately, so I've been a little absent, but I'm trying to catch up! Thanks for all your comments, I promise I'll respond to them soon (make sure you're not a no-reply blogger)!

We've been working on a few things around the house to maximize the space we have (our house is small). So we've been moving some furniture around and trying to get creative. One thing we wanted to do was create a more usable eating area. Our house does not have a separate dining room, and we've had a dining set from Ikea in our house, which I love, but it just didn't work perfectly for the space. We decided we wanted to make more of a nook area with an L-shaped bench and a pedestal table to be able to use more of the space.

My parents found these two old restaurant tables at the Restore near them (for $7 total!!), and Handy Andy said we could make them work by putting them together and covering them with wooden planks to give it a nicer look. Have I mentioned that my husband is handy? Oh, I have... :)

Here's what we started with:


Handy Andy used a board to fasten the tables together from the bottom. We chose some tongue and groove wood flooring for the table top (the box was about $50). Andy started by putting two planks on each end of the table going along the shorter side. Then he nailed planks going the long way between the end pieces.


After the top was finished, Handy Andy nailed trim along the sides of the table to finish it off. It's not quite finished yet, we're going to distress and sad the top to give it a weathered look. Then we'll seal it with shellac. But here it is for now...


I absolutely love this table - it is so beautiful! It'll be fun to distress and finish. Total, we spent about $60 on this project, which is a great price for a piece that perfectly fits our needs/space and is so beautiful!

Handy Andy has also made one of the benches for the table. He will made one more longer one, and then we will sand and finish those off as well. He made this bench with materials he already had!


Well that's part of what we've been doing around here lately. I hope you're having a productive week!

Thanks for stopping by!


Thursday, July 26, 2012

Ikea Kid's Bed Makeover

Hello All! I hope you're having a great week! A few weeks ago we took a few days off work and stayed home with no plans - it was amazing! I got a few projects done that have been on my list for a while. The biggest one (besides cleaning my whole house) was this kid's bed makeover for one of my favorite little me, my nephew Dylan. I made him some name blocks a few months back to go with his room, and it's almost time for him to switch to a big boy bed, so I volunteered to paint this bed to match his football-themed room too!

Dylan's parents found this bed at Ikea for $19 in the as-is section - love that section!

Here's the before... (yes, I painted in my kitchen - it was too hot outside!)


And here's the after...


I used a light gray paint as the base, red for the lines and brown for the guard bar. I cut out Dylan's initials using my cricut and traced them on the headboard and then hand painted them with the light gray. I also glued a wooden football from Hobby Lobby with Gorilla Glue. I love the way it turned out - so cute!

Well, thanks for stopping by, have a happy Thursday!


Wednesday, May 16, 2012

Mirror, Mirror...

Hi, my name is Liz, and I'm OCD...

...I'll be the first to admit it. Always. I have some serious OCD tendencies. For example, my closet is categorized and then arranged by color. ROYGBIV, baby.

It's okay if you don't want to be my friend anymore. I know, I'm weird.

Anyway, what this translates into as far as decorating is that I get obsessed with something and then I feel like it completes my life [until my next obsession hits]. Here is a prime example:


That table was made for this space in my house. I am convinced Ikea made it with my house in mind. [Never mind that it was made before I even owned a house, and before we cut half of that wall out, which created the perfect spot for the table.] I saw it a few years ago in a catalog, and then it began. I. was. obsessed. Unfortunately, that table is $250, which was way out of my price range. That did not stop me. I was determined to have that table, and one day, it happened. That very table, the love of my decorating life, was being sold on Craigslist for $80. Done and done. It was mine. United with the space it was made for.

See? OCD.

Well, a few weeks ago I decided that I didn't like the decorative piece that was hanging above my couch in the living room. I spent a few days deciding what I wanted to hang there instead. Gallery of photos? Painting? And then it hit me. A mirror.

Then came the obsession. I was looking on Craigslist, scouring the internet, Pinterest, home interior blogs, Ikea, to find the inspiration for the perfect type of mirror. And then I found it. I was walking through the super clearance aisle at Hobby Lobby with my dad, and there it was. The most perfect mirror for my orange wall, on sale for $30. The back was broken, so it was marked down from $90!
I took that beauty home and, with Handy Andy's help and some Gorilla Glue, she was display ready.


While the mirror is perfect for my living room, she was not meant to live alone. So, my new obsession is figuring out what to hang with it. Any ideas?

Thanks for hanging on while I ramble like a crazy and wax poetic about furniture and decor. Tell me I'm not the only one...


Thursday, May 10, 2012

Night Table Makeover

Happy Thursday! This project was one that I did for a guest post over at Bella Nest a few weeks ago for her Drab2Fab series.

For my Drab2Fab project, I took a little piece of furniture that I already had that was well in need of a makeover. There are several things about this project that are awesome, first one being that this table was FREE. Several months ago my mom gave me this little night stand.

Photobucket


Cute, but clearly in need of an update. Now, this little table has been sitting in the guest room since I brought it home, and since we're changing our guest room to into a kid's room (see more on that here), now is the perfect time to makeover this little piece to match the new room theme.

Since the new color scheme of the room is going to be blue, green and yellow, I decided to paint the table top yellow and leave the bottom natural. Awesome thing number two is that the gallon of yellow paint I used was only $5.00 in the oops section in Menards - bonus! First, I sanded the table top with an electric sander and then I painted several coats of the yellow on the table top.


Now to add a decorative touch to the table. Since I've decided to go with an alphabet/word theme for the room, I used some alphabet stencils from Hobby Lobby that I got for $2.99 and some more paint that I got from the oops section for only $1.00 (yup, awesome x3).

Photobucket


I actually ended up using a much smaller brush than pictured to paint the stencils. After the letters dried I took the sander again and went over the whole table top to give it a nice distressed look, especially around the edges. 


Add some Minwax stain, wait 5 minutes, wipe off.


After the stain dried, I rubbed on some Minwax paste wax finish. I've never used this product before, and I'm not really sure I used it right, but I like the end result! After the wax dried, I polished the table with a clean, dry rag. It gave the table a smooth, slightly shiny finish.

Photobucket


Wahhh La! There it is. It turned out way better than I expected - I really like it! This is definitely the brightest color I've painted a piece of furniture, and I'm really glad I took the risk.

What do you think??

Thursday, December 22, 2011

Headboard Bench

What kind of tribute blog to Handy Andy would this be if I didn't feature some amazing projects from the man himself every once in a while? That's right, no kind. So, in lieu of a Pinterest Thursday project (because I've been too busy to do one this week), I give you Handy Andy's latest project.

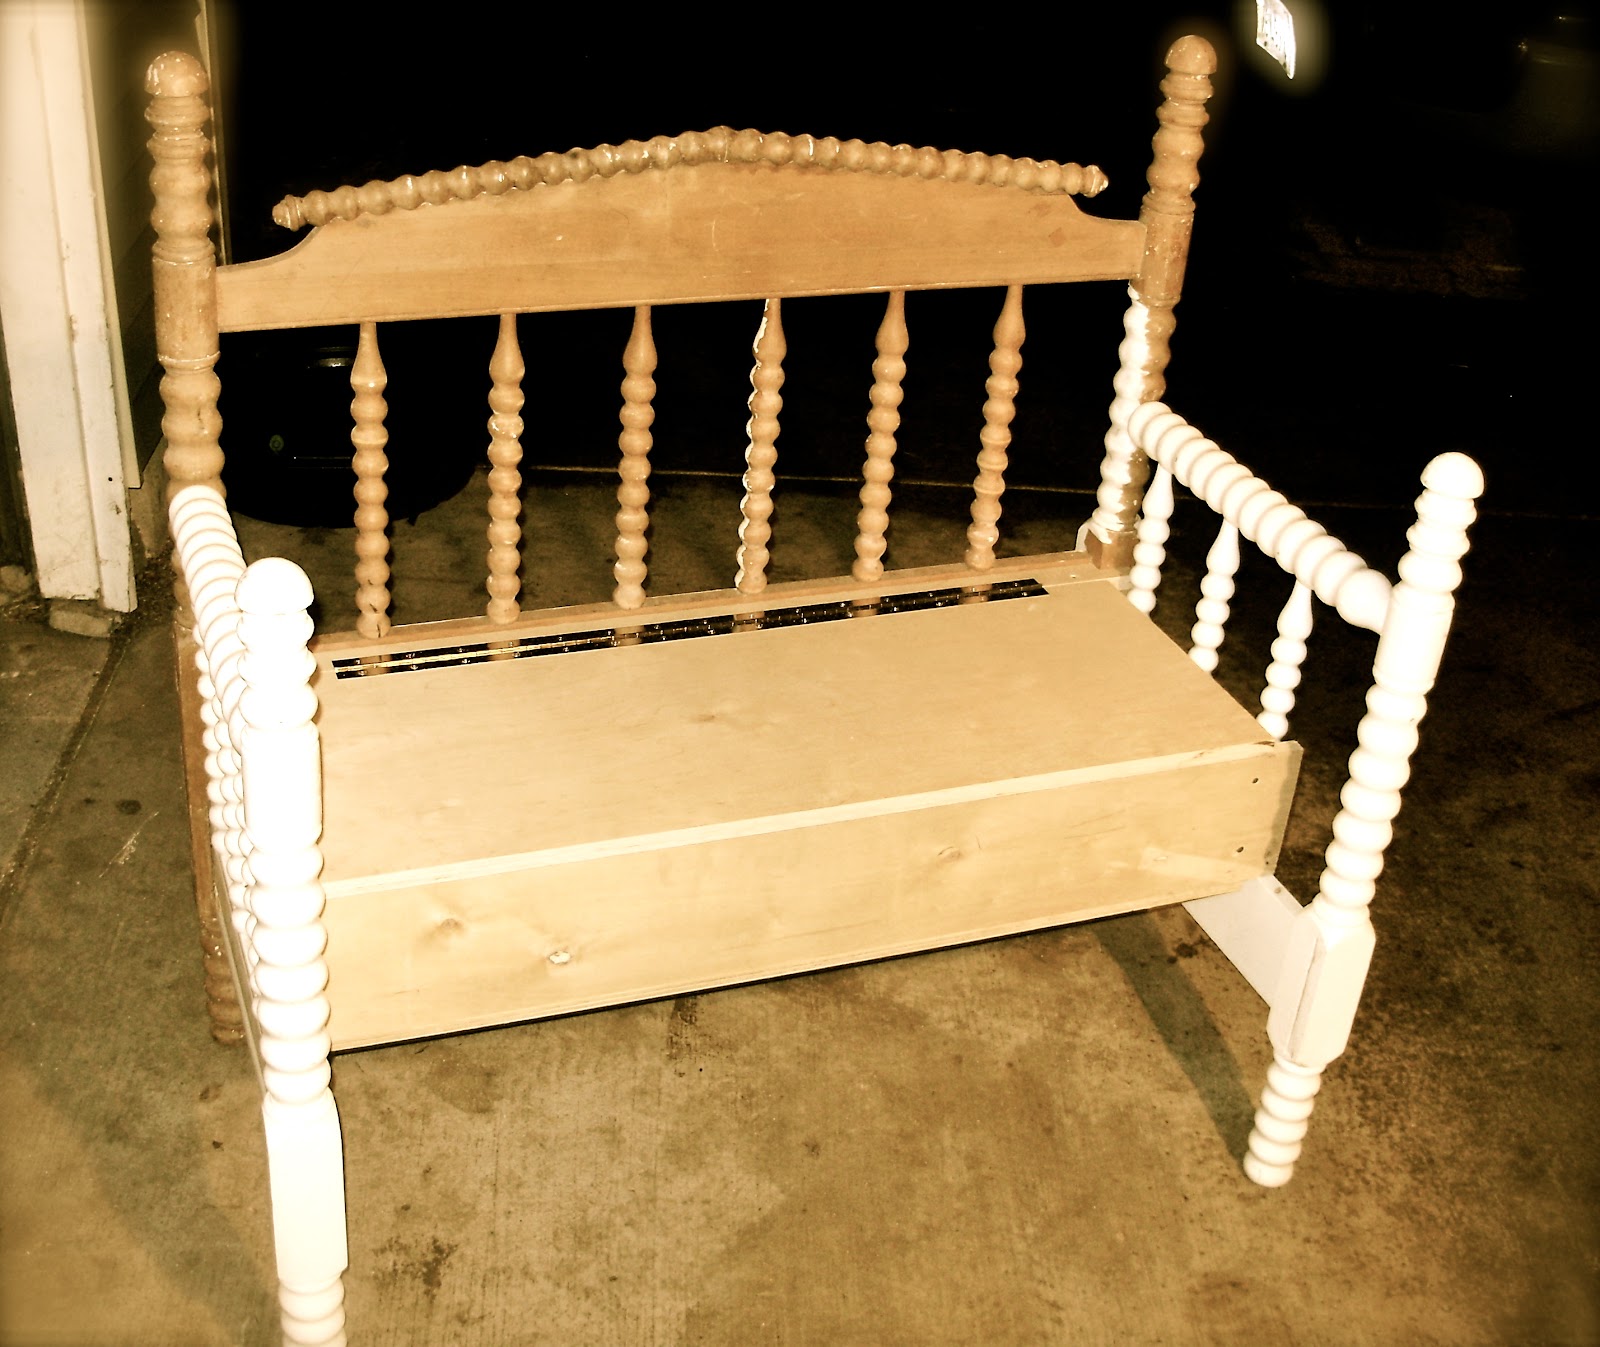
A while ago, Handy Andy's mom asked him to create a bench out of an old head- and foot-board set she had. The project sat in the garage for a while because of some other pressing projects [see his sister's wedding arch here]. However, recently, he decided that he wanted to finish it for his mom for Christmas, so he did it over the weekend. Literally, he started and finished this project in less than 2 hours. The man is truly handy. Unfortunately, there are no before pictures, because Handy Andy apparently doesn't think of my blog when he does projects [WHAT?! I know, right]. But, here is the finished project:


He used the headboard as the back of the bench and cut the footboard in half for the sides. Then he worked his handy magic on the rest, and I have no idea what he did. He is leaving it in it's original mismatched painted state because he doesn't know what his mom wants to do with it as far as colors [best to leave that to someone who cares about decorating].


I love the look of it! It's really cool, and the bench seat opens up to a little storage box as well.

So there you have it, another awesome project from the man who inspired my blog. If you want to see some of his handiwork in our house, check out the before and after of our living room!

I hope you all have a lovely Christmas weekend! I'll be back next week!

Merry Christmas!


P.S. What do you think of my new banner? I'm not sure I like it.

Linking up here:


Photobucket


button

Friday, September 30, 2011

Thrift store love & my new chairs

A few weeks ago Handy Andy and I took a trip to a local thrift store. He was looking for some new flannel shirts (oh yeah), and I was looking for anything I could use in a scrapbook and maybe a picture frame. I found a few fun things, including Scrabble tiles, some vintage-looking cards and an excellent frame.

While I was rummaging around, I passed by the furniture section and came across these chairs that I instantly loved. There were three of them, but I only bought two. They were $5 each.


Ok, so they don't look like much, but I loved the look of them and I had been looking for another little something to put in my living room. I had seen a chair I really loved from Target:


The problem? For starters, it was about $200 over budget. Also, it was a little too big for the open spot in my living room.

So, back to my thrift-store chairs. I had read Centsational Girl's blog post about refinishing a thrift-store chair, so when I saw these chairs I thought (in true Handy Andy fashion) "I can do that!" I brought them home and prepared for the refinishing. I gathered the following supplies (most from Handy Andy's collection):


1. Spray paint
2. Staple gun
3. Scissors
4. Sandpaper
5. Amazing fabric (that I bought from JoAnn's - on sale!)

Next, I took the seats off by flipping the chairs over and unscrewing the four screws that held the seats on.


I lightly sanded the chairs all over and wiped them down with a damp cloth. Then spray paint. My mom was visiting, so that was her job while I worked on painting another project I'll share later.

While the paint dried I cut two pieces of fabric for the seats. On Centsational Girl's post, she added some padding, but I actually thought the seats were comfortable enough. I covered the seat as they were, old fabric and all. I folded the fabric around the seats tightly and used the staple gun to secure the fabric on the underside of the seat. All that's left is screwing the seats back on to the chair frames, and...


Done! Well, this was taken before they were actually done, because I had to go back and fix a few spots with the spray paint. After that I moved them to their rightful place in my house...


They are perfect for the space and it only cost me about $30 total. I call that a success! What do you think?


P.S. Linked up to The Idea Room's linky party. Check it out to see more fun projects!

Photobucket