***Come link up your crafts to this week's party!***
Showing posts with label Handy Andy. Show all posts

Thursday, January 17, 2013

Refinished Table

Hello All! I hope your week is going well. We've been really busy lately, so I've been a little absent, but I'm trying to catch up! Thanks for all your comments, I promise I'll respond to them soon (make sure you're not a no-reply blogger)!

We've been working on a few things around the house to maximize the space we have (our house is small). So we've been moving some furniture around and trying to get creative. One thing we wanted to do was create a more usable eating area. Our house does not have a separate dining room, and we've had a dining set from Ikea in our house, which I love, but it just didn't work perfectly for the space. We decided we wanted to make more of a nook area with an L-shaped bench and a pedestal table to be able to use more of the space.

My parents found these two old restaurant tables at the Restore near them (for $7 total!!), and Handy Andy said we could make them work by putting them together and covering them with wooden planks to give it a nicer look. Have I mentioned that my husband is handy? Oh, I have... :)

Here's what we started with:


Handy Andy used a board to fasten the tables together from the bottom. We chose some tongue and groove wood flooring for the table top (the box was about $50). Andy started by putting two planks on each end of the table going along the shorter side. Then he nailed planks going the long way between the end pieces.


After the top was finished, Handy Andy nailed trim along the sides of the table to finish it off. It's not quite finished yet, we're going to distress and sad the top to give it a weathered look. Then we'll seal it with shellac. But here it is for now...


I absolutely love this table - it is so beautiful! It'll be fun to distress and finish. Total, we spent about $60 on this project, which is a great price for a piece that perfectly fits our needs/space and is so beautiful!

Handy Andy has also made one of the benches for the table. He will made one more longer one, and then we will sand and finish those off as well. He made this bench with materials he already had!


Well that's part of what we've been doing around here lately. I hope you're having a productive week!

Thanks for stopping by!


Wednesday, December 26, 2012

Home State Wall Art

Hello All! Happy day after Christmas! I hope you all had a wonderful holiday! I was pretty productive the week before Christmas so I could do nothing this week. During my productive spurt, I put Christmas projects aside for a little bit and worked on a project that has been on my list for a while.

During the summer I ordered a map of the states both Handy Andy and I were born in, from the years we were born. I intended on framing each of the maps and hanging them in our living room. Unfortunately, my map never made it here, thank you USPS.

I still wanted to do something with Andy's map, so instead of framing it, I decided to make a faux wrap around canvas art piece. Here's what I gathered:


20 x 20 Canvas ($13 at Hobby Lobby)
Map
Mod Podge & Brush

I used an utility knife to cut the map slightly larger than the surface of the canvas. Then I brushed Mod Podge all over the canvas, laid the map on it, and smoothed it out. Before brushing more Mod Podge over the top, I took a staple gun and folded the map around the edges of the canvas and stapled the edges. The I brushed Mod Podge over the map. It bubbled at first, but after it dried everything flatted out. Then I used some black ink and a sponge to ink the edges of the canvas and add a weathered look to the rest of the map.


I used by Cricut to cut out the word HOME with red vinyl. I positioned the letters so that Andy's hometown was in the middle of the O. Then I brushed more Mod Podge over the letters so they would stay.


I love the way it turned out and so does Handy Andy! Plus, we just rearranged our living room and it looks GREAT hung up on the wall. Too bad we don't have a Michigan one for me...

Thanks for stopping by!


Wednesday, December 19, 2012

Guest Post from THE Handy Andy

I think I've mentioned that we're doing handmade gifts this year, right... Okay fine, I know I've mentioned it more than once... And while that mostly means that I am making the gifts, Handy Andy did pull his weight. He made a really awesome gift for our oldest nephew and our youngest niece, and so I'm going to let him tell you about it...

I decided to make a simple wooden toy for our niece and nephew. So I found a picture on Google of a simple wooden camera toy that looked easy enough. I had a bunch of scrap lumber that I got from a job that I've used in the past for projects (like the birdhouses), so I used that since it was free.

First thing I did was draw the outline of what I wanted the camera to look like on the board. 


After that I used my jigsaw to roughly cut out the pattern. At this point I wasn't worried about making it perfect or rounding any corners, I just wanted to get the rough frame cut out.


For the lens, I cut out a simple circle with my jigsaw.


Next I used my palm sander to sand off the stain that was previously on the wood from before. Also, I sanded the rough edges and rounded the corners on both pieces.


To make the eye hole, I used the 1 3/8" paddle bit with my drill. I made sure to only drill halfway through from each side to avoid splintering the wood off the back.

I used wood glue and clamps to attach the wooden lens to the front of the camera.


I made two wooden cameras. They are different sizes, and I made the lens on one of them bigger by using two circles of wood and gluing them together. Here are the finished toys:


Aren't those so fun?! I love how old-school they are, and I think the kids will love them. They would also make pretty cool photo props or decorations. Did I mention that my husband is super handy, and awesome? Oh, good. :)

 Thanks for stopping by! Have a Merry Christmas!


Thursday, August 30, 2012

Closet Expansion

Hey All! Hope you're having a lovely week. I think it's about time to share another project straight from Handy Andy himself.

I know I've briefly mentioned how our house is a continuous project (see a snapshot of before and after here). Well, for some reason beyond comprehension, our closet had a single door opening, but the space went farther than one door over in the wall. This was super annoying because half of our stuff (ok, maybe it was mostly Handy Andy's stuff) was behind the wall and not easy to get to.

Enter: Handy Andy.


We've been talking about opening up the wall for a while, so one free afternoon, he just went for it. He cut out the drywall, stud, and that white thing above the existing opening.


Then he patched up the side and top with drywall. He also tore out the carpet that was there and replaced it with some hardwood we had left over from the living room.


This freed up so much more usable space in our closet! Now we can even put our shoes in our own closet instead of the office closet! We still have to get some paint to finish the job, but I'm am so happy this is finally done, and it only took him a few hours to get everything done and back into place, base trim and all! Have I mentioned he's super handy? Oh, good.

Have a good one!


Wednesday, May 23, 2012

For the Birds...

Hey All! I think summer is officially here. The weather has been so nice lately! This weekend Handy Andy and I took advantage of the nice weather on Saturday and spent some time outside. We decided to make some birdhouses to put up around the yard to replace this rundown little house that was hanging on our tree when we moved in.


What a sad little bird abode!

So Handy Andy went to work with the table saw cutting out the pieces we needed, based on the design of the old one. We started with a pile of 1x6 boards [which are actually 5.5 inches wide].


Here are some rough measurements:
Top: 7 inches long (make sure to cut the top end at an angle to fit against the back board)
Back: 14 inches long
Sides: 12 inches long on the tall side, 15 degree slant for the roof
Front: Cut to match the short sides of the side pieces
Bottom: 5.5x7 inches

Then we started putting the pieces together. First we used wood glue and then we nailed the pieces together, using vise grips to make sure the glue did it's job first. [I promise I did some of the work, even though all the pictures are just of Handy Andy...]


And then, we had a new house for the birds!


This was such a simple project, and it would be great to do with kids, because they could paint the houses after you're done building them!

I hope you're finding ways to enjoy the weather as well! Have a great week!


Wednesday, March 7, 2012

Organizing My Office/Craft Room

I've been crazed for the last several weeks and haven't had much time to do any crafts, so I will share an ongoing project that we've been working on...

Our craft room [better known as Sparty's Room] is generally treated as the catch-all for craft stuff, school stuff, financial stuff, etc. Over the last several months it has become a monster. I took some pictures of it a while ago, but I can't find them now...they must have gotten lost in the abyss that was Sparty's Room. Anyway, one afternoon, Handy Andy and I were talking about how it would be better if we moved the oak book shelf that was in Sparty's Room and replace it with a wider, taller shelf to hold all my crafting supplies.

At that point Handy Andy said his signature line "I can make you that!" And he did. Literally, less than two hours later, the book shelf and books were relocated to the living room, and he had crafted a huge shelf for Sparty's Room. Did I mention my husband is amazing? Okay, good.

After that, I headed to Hobby Lobby to get some boxes, baskets, containers, whatever...to hold all my junk. Check out my clearance storage containers if you missed it. Aside from those, I got several photo boxes to store scrapbooking stickers and such, a big paper storage binder, a few miscellaneous containers, and a big basket all on sale [that's how I roll]. I also used some jars to hold some random things.

I finally was able to organize all my crafty stuff into one place, and it is beautiful. Did I mention I'm a little OCD? Yeah, I love to organize. Anyway, here are some pictures of my lovely shelf in all of it's organizational glory...[sorry about my crappy iPhone pictures, my camera is broken again]


Now all I need to do is get the rest of the room cleaned up and we'll be all set.

Hope you're having a good week!


Thursday, December 22, 2011

Headboard Bench

What kind of tribute blog to Handy Andy would this be if I didn't feature some amazing projects from the man himself every once in a while? That's right, no kind. So, in lieu of a Pinterest Thursday project (because I've been too busy to do one this week), I give you Handy Andy's latest project.

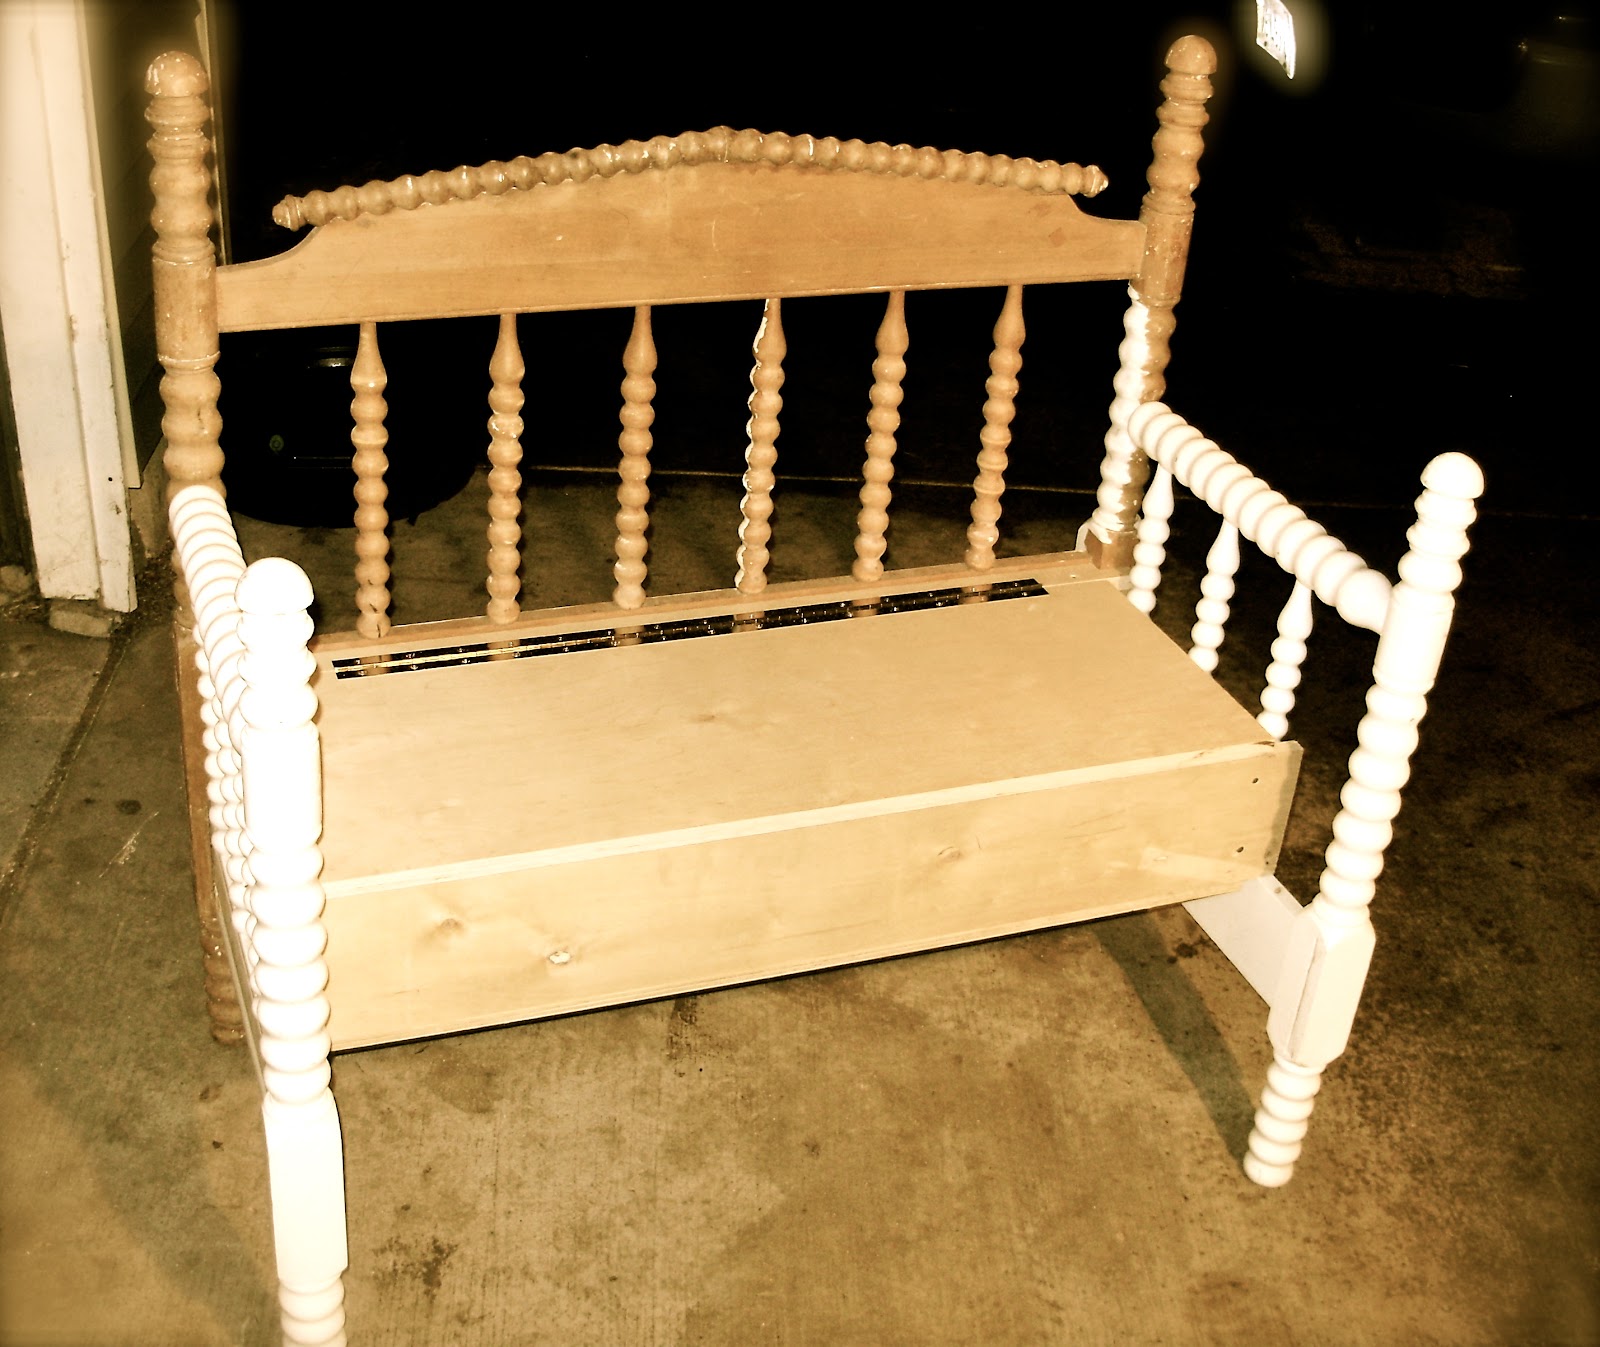
A while ago, Handy Andy's mom asked him to create a bench out of an old head- and foot-board set she had. The project sat in the garage for a while because of some other pressing projects [see his sister's wedding arch here]. However, recently, he decided that he wanted to finish it for his mom for Christmas, so he did it over the weekend. Literally, he started and finished this project in less than 2 hours. The man is truly handy. Unfortunately, there are no before pictures, because Handy Andy apparently doesn't think of my blog when he does projects [WHAT?! I know, right]. But, here is the finished project:


He used the headboard as the back of the bench and cut the footboard in half for the sides. Then he worked his handy magic on the rest, and I have no idea what he did. He is leaving it in it's original mismatched painted state because he doesn't know what his mom wants to do with it as far as colors [best to leave that to someone who cares about decorating].


I love the look of it! It's really cool, and the bench seat opens up to a little storage box as well.

So there you have it, another awesome project from the man who inspired my blog. If you want to see some of his handiwork in our house, check out the before and after of our living room!

I hope you all have a lovely Christmas weekend! I'll be back next week!

Merry Christmas!


P.S. What do you think of my new banner? I'm not sure I like it.

Linking up here:


Photobucket


button

Tuesday, September 27, 2011

Meet Handy Andy


Handy Andy is my husband. He can make anything. Want some proof? Here it is...

Handy Andy's little sister got married recently. When she got engaged he told her he would build her anything she wanted for her wedding present. She decided she wanted an arbor made to use in her wedding ceremony. The picture she showed him as an example of what she wanted was this:


So, he started building...when it was almost done it looked like this:


And this is what it looked like on her wedding day:


BEAUTIFUL!

Another great thing about Handy Andy is that he is creative and he likes to make things that solve problems. Proof? Fine. Handy Andy finds my hair ties and bobby pins everywhere. Why? There's no good place to store/organize them all. This was a problem in Handy Andy's eyes. So, for Christmas a few years ago he put this in my stocking:

 
Brilliant.

It has hooks for my headbands and hair ties, and flat metal pieces in between for my bobby pins. Love it!

These are just two examples of the excellent things that Handy Andy has come up with. There are many many more impressive projects (including our entire remodeled house, maybe I'll post some pictures later). And this is the inspiration that has led to me to create this blog as a way to record the projects that I undertake as I adopt Handy Andy's [slightly edited] mantra, "I [think I] can make that!"